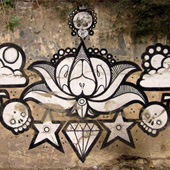
1. After the sketch of the desired artwork is prepared, study it to understand how it will stand on the actual wall with its magnified proportions.

2. Once you are ready, prime and clean the surface to be painted upon. Get rid of any dust, dirt and scrape off any excess paint if needed from the section where you need to paint.

3. If required one can use a primer as the base coat on certain sections of the wall. This will prevent the outdoor wall from absorbing the paint and making the artwork dull eventually. Wait for it to dry.

4. If the wall is very big you might require a grid to plot out the entire drawing. This means a square grid has to be drawn over the sketch and a proportionally bigger one has to be marked out on the wall. And following the grid on the sketch the drawing has to be made upon the wall. Most artists who have a better command over proportions prefer doing a free hand sketch.

5. The design will always have to be painted back to front - meaning the bigger patches in the background have to be painted first followed by the next few elements and then finally doing the details. During this process if there are any mistakes made, they can always be rectified later.

6. If overlapping colours or painting adjacent objects, please ensure that the previous coats of paint are dry or else the colours might get mixed. At times artists use stencils, card board cut-outs and masking tapes while filling certain shapes.

7. With every level of painting, your tool of painting might change. For instance the bigger patches can be filled with rollers and spray cans. The smaller ones with flat brushes. And the details can be done with marker or paint pens.

Spray cans can be used for artworks with a bigger patch, and while painting upon rough, uneven surfaces.

Rollers and thick brushes can be used to create the bigger patches of the artwork.

While detailing can be done with a finer brush & paint.
8. Correct any mistakes or drips that you notice after the artwork is complete.
9. You might want to consider wearing a bandana or mask to keep your nose covered while working with the paints.
10. You could use a sealant or a fixer spray to give a final coat over the artwork to prevent it from getting damaged by the weather, also giving it a finished look.
11. While working one needs to step away from the artwork every few minutes in order to get the proportions and colours correct.
12. Clean your tools or else the brushes and paint may start drying up, becoming useless.

13. Document all your artwork, take pictures. Interact with people when you can. And share your work.

Documenting the work.

A mother and child have a debate about the artwork, maybe interpreting it in their own way, on a particular evening on the Ghats.
Working outdoors is a totally different challenge and remains an uncontrolled atmosphere. You may overlook the reaction the wall can have with the paints, as it remains a rough unfinished wall - there will be curious onlookers, and people who want to interact and decipher the artwork. Stray animals, strong winds, scorching sunlight or even worse ... rainfall also might be an interruption. But it can still be a lot of fun as you can see.

The young boatmen posing for a photo with the artists. The fun about working in an outdoor space, is the type of interactions and conversations that you can have with the people around.

