Design Course
Freehand Sketching
Rediscovering the Act of Sketching
by
Day 9
Introduction to Day 9
Today, under Warm up, we quickly revise all that we did in the Workouts in Session 1 and 2.
Under Workouts, we learn to draw Circles and Semi-circles correctly.
Under Sense of Perspective Space, we learn how to draw correct perspective circles (which are nothing but ellipses) within perspective squares, in order to draw cylinders within cubes.
Preparation:
• Download and Print:
1. D9_Grid-reference-sheet-for-session-3-4-5
2. D4_45-deg-10cm-Cube (Optional, if shroud preserved from Day 4)
3. D4_30-60-deg-10cm-Cube (Optional, if shroud preserved from Day 4)
4. D9_Vertical-Cylinder-within-45-deg-Cube_Solution
5. D9_Horizontal-Cylinder-within-30-60-deg-Cube-Option-a_Solution
6. D9_Horizontal-Cylinder-within-30-60-deg-Cube-Option-b_Solution
• Tracing sheets
• Soft pencils - 2B, 4B, 6B, etc.
• Measuring ruler/scale (for Sense of Perspective Space exercise today)
• Compass and Long ruler and set squares preferably, for drawing the Grid.
• Music
Overall Time Plan: - hours
• Warm up : 15 mins.
• Workout : - mins.
• Sense of Perspective Space : - mins.
Warm up
15 minute Exercise:
0-5 mins : Practice very fast hand and body movements while drawing Horizontal, Vertical and Inclined Lines
5-15 mins : Repeat the various workouts covered in Session-1 and 2 WITHOUT the underlay grids, using SIGNATURE GRIP.
While drawing these, remember to:
1. Draw them for various lengths.
2. Draw them in either direction
3. Draw them at various pace - fast, slow, fast to slow in a single line, etc.
This practice of initially drawing the lines fast and then slowing down will help your body get into smoother drawing action for the workouts and perspective exercises ahead.
<Warm up Ends>
Workout
Drawing with hand not normally used
Like most learners, do you still feel the need to be reminded to move your body while sketching?
We find that the 'Drawing with the hand not normally used' makes the body to automatically come into action!
Thus we adopt Signature Grip as our new practice strategy. For this, the learner must use the hand not normally used i.e. the right-handed use the left hand and vice versa to do the exercises, as shown in the video below.
[Read more...hand not normally used]
Note: Henceforth:
1) Adopt the hand not normally used and repeat few exercises everyday from the daily sessions.
2) Remember that the right-handed will use the left hand and vice versa.
3) Check that your pencil grid does not change and line consistency is maintained.
Circles:
1. Aim: Drawing Circles and Semi-circles correctly
• Improve line quality
• Control circle-ness of circle
• Improve fluency
2. Set up:
• Tracing sheets, soft pencils, music
• Grid - You will need grid G11 for today's session.
Remember to preserve all the grid sheets post Workout, for later use.
Print and prepare the set of grids required in this session as per the grid reference sheet provided. [Download ....D9_Grid-Reference-Sheet-for-Workout_Sessions-3-4-5]. Also note that this session utilizes some of the grids introduced in the earlier sessions, so keep them handy.
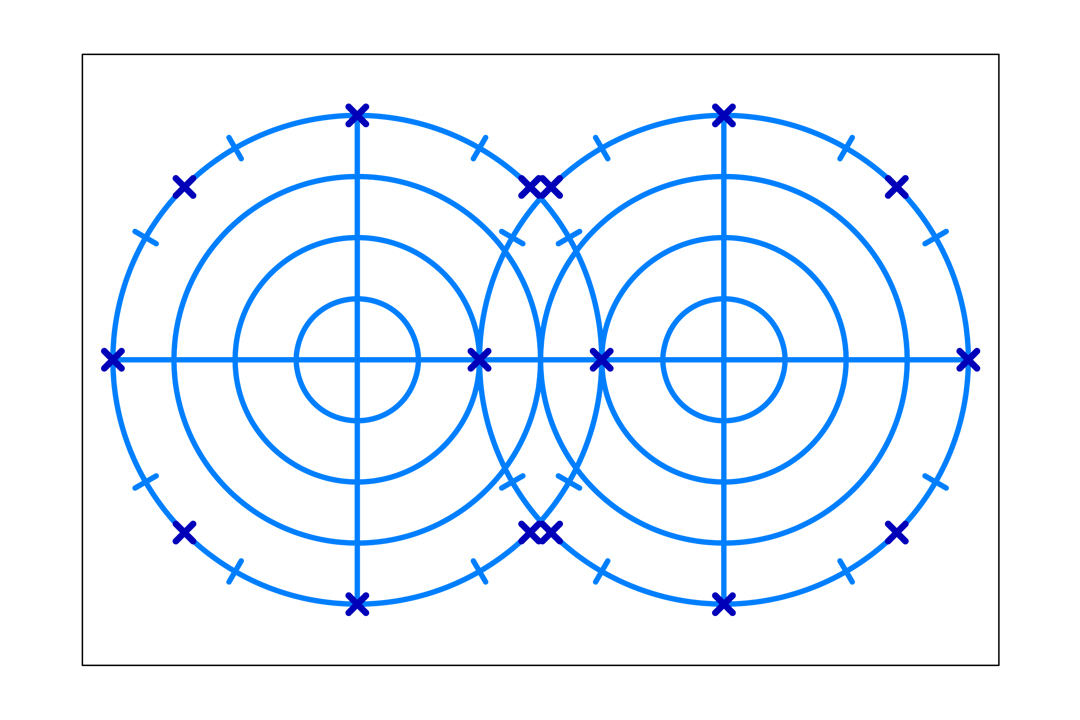
Image 9.1: Grid 11_Circles @50mm offset of radii successively from centre. First circle radius is 50mm
3. Body Posture:
Keep your forearm perpendicular to the edge of the board and move it from the shoulder joint. This means the forearm will be at 45 degrees to the line drawn. You must bend and create a gap so that the forearm can move smoothly.
Observe the hand movement for drawing circles in the video below.
4. Exercises:
Circles and Semi-circles, using hand not normally used for few later exercises.
Variations explored: Concentric circles and semi-circles - clockwise and anti-clockwise on circular and square grids, floating closed semi-circles.
9.1) Close Concentric Circles on Circular Grid/outwards and inwards: 10 mins - 1 sheet
On an overlay with the circular grid (grid G11) below, practice drawing circles, one around the other, outwards in anti-clockwise direction with an increment of 2cm for each successive diameter.
Video 9.1: Concentric Circles drawn in anti-clockwise direction outwards on a Circular Grid
Note: Concentric circles are drawn close to each other, and with uniform pressure and thickness. While drawing, your primary objective is to maintain your hand position perpendicular to board's edge, as if you were drawing a vertical line (as elucidated in the video above).
9.2) Close Concentric Circles on Circular Grid/ inwards to outwards: 10 mins - 1 sheet
Repeat this exercise, but now go inwards i.e. from the outermost circle (i.e. of 40cm dia) draw concentric circles with a successive decrease of 2cm for each successive circle. While practicing, also try changing speed (fast, slow, etc.) and direction (clockwise/anti-clockwise)
9.3) Spread Concentric Circles on Circular Grid: 10 mins - 1 sheet
Now, with an overlay on the same circular grid (template GT11), practice drawing concentric circles outwards in anti-clockwise direction with an increment of 7cm for each successive diameter.
Note: Spread Concentric Circles are to be drawn far apart and with uniform thickness and pressure.
9.4) Drawing Circles in between Concentric Circles on Circular Grid: 10 mins - 1 sheet - use previous exercise's sheet
Now, continue on the same tracing sheet as used in exercise 9.3 above. Draw a circle in between two concentric circles (e.g. a circle of 7.5cm dia between the 5 and 10 cm circles) as shown in image below. Further subdivide to get four equal divisions between 5cm and 10 cm circles. Repeat for all concentric circles. Again, use grid G11 for this.
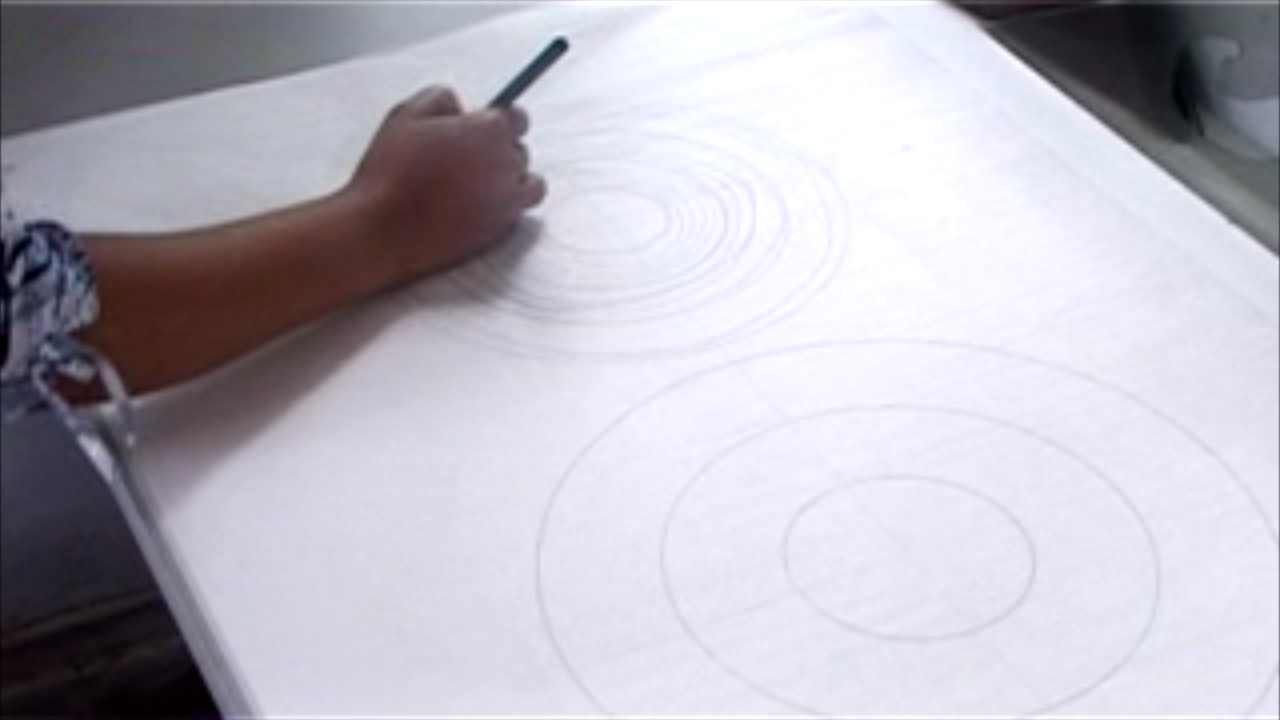
Image 9.1: Drawing Circles in between Concentric Circles on a Circular Grid
9.5) Changing Start Points while drawing on Circular Grid: 10 mins - 1 sheet
If you notice, the Circular Grid G11 has points marked at 30 and 45 degrees along the outermost circle. For ease of practice, imagine a clock. You must start drawing your circle at 1 o'clock position, i.e. at 30 deg. from the vertical, clockwise, as shown in diagram below. Next start and end drawing a circle clockwise from 2 o'clock, then 3 o'clock and so on. Maintain a successive difference in diameter as say, 3cm. Also practice with the points marked by (X) at every 45 degree. Do this till you reach 12 o'clock. Repeat anti-clockwise.

Image 9.2: Using Clock-hours for practicing change of Start-Stop Points on a Circular Grid
9.6) Close and Spread Concentric Circles on a Square Grid: 10 mins - 1 sheet
Change the grid to a square one i.e. say 15x15 grid. (Use template GT3, used in Session-1) and repeat by changing speed, direction and starting points for close and spread concentric circles (2cm and 7cm respectively). First practice drawing inwards from an outermost circle, then draw outwards from a chosen centre point on grid.
Video 9.2: Concentric Circles drawn in anti-clockwise direction outwards on a Square Grid
Note: Without the Circular Grid, you need estimation of diameter. The square grid gives you some assistance for this.
Once you are confident enough, you should be able to draw concentric circles without depending on any grid references. For this we must graduate from circular to square grid, and further on, draw on blank sheets with only a marked centre, as discussed below.
9.7) Close and Spread Concentric Circles with respect to a Marked Centre: 10 mins - 1 sheet
Begin by drawing a circle of 30 cm dia. around a marked centre. Draw concentric circles, clockwise, which decrease 2 cm in dia. as you go inwards. Draw them for each of the following diameters after marking a single centre-point. You DO NOT NEED a grid for this exercise.
Use Clock start-stop points.
Lastly, draw Concentric Circles with a successive increase of 7 cm dia, clockwise, starting at a marked centre. Repeat anti-clockwise.
Note: Remember to maintain uniform pressure and thickness. This exercise helps assess improvement in controlling the consistency in drawing perfect circles.

Image 9.3: Very Close Concentric Circles drawn fast, with respect to a Marked Centre
9.8) Concentric Semi-Circles on a Square Grid: 10 mins - 1 sheet
The first set of part circles we will practice in this session is the half/semi-circle. Practice drawing concentric semi-circles on an overlay with a square grid below (Use G3) with 1cm increment in radius with every subsequent semi-circle.
The challenge while drawing any part curve is getting it right at the end points.The most common error is the tapering or unusual flattening near its end points due to abrupt stop to the flow of line. Hence, we suggest you adopt the common practice of extending the drawn line both ways to ensure the desired curve.

Image 9.4: Extension due to flow while drawing helps avoid flattening or tapering of curve near the end-point
Video 9.3: Concentric Semi-circles on a Square Grid
Note: Since the 'curve' must exactly start at the axis, it is desirable to approach the axis with a straight line first, and then start curving at the axis, and reverse this when you are about to end the curve.
Now, practice by starting at different points on the axis, and also by changing direction (anti-clockwise, then clockwise) for each of the following diameters.
(a) 5cm
(b) 10cm
(c) 15cm
(d) 20cm
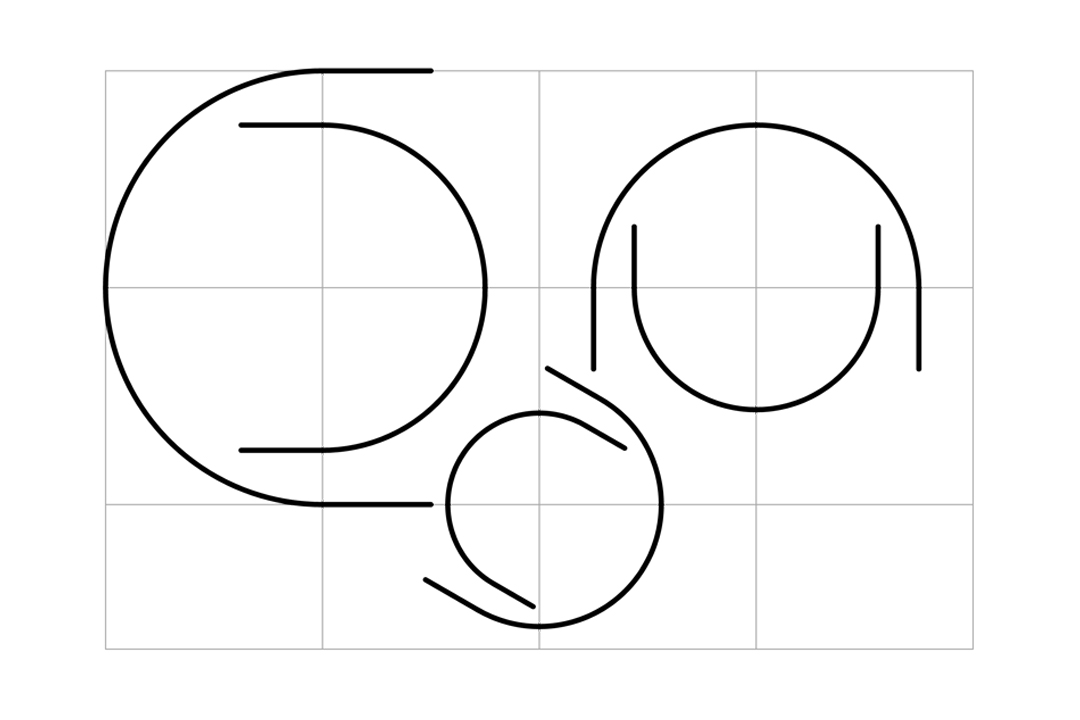
Image 9.5: Semi-circles on a Square Grid
9.9) Closed Floating Semi-Circles: 10 mins - 1 sheet
Draw closed floating semi-circles of varying radii, of your choice. Practice with changing starting points and the direction of drawing. Do NOT use a grid for this exercise.
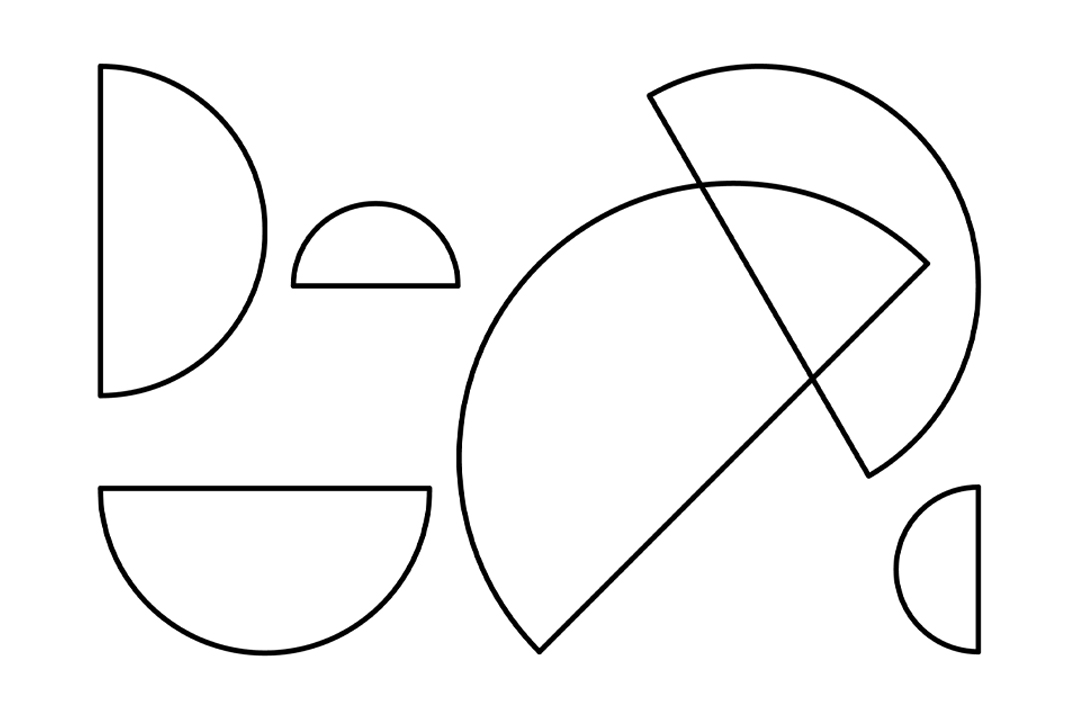
Image 9.6: Closed Floating Semi-Circles
<Workout Ends>
Sense of Perspective Space
1. Aim: Drawing cylinders within cubes accurately: by drawing correct ellipses within perspective squares
(Cube is oriented at (i) 45 deg or
(ii) 30-60 deg to Picture Plane)
2. Set up:
Tracing sheets, measuring ruler.
3. Exercise:
1. Observe the image 9.7 below of a Plan view of a Cylinder housed within a Cube.
2. Starting from 10 cm base cubes provided on Day-4 of Session-1 as base reference, [or download them here...D4_45-deg-10cm-Cube; D4_30-60-deg-10cm-Cube], draw the following on tracing sheets:
(a) Vertical Cylinder of 10cm dia. within the 10cm 45 Degree Base Cube
(b) Horizontal Cylinder of 10cm dia. within the 10cm 30-60 Degree Base Cube
Note: The diameter of the cylinder is the same as length of one side of cube, i.e. 10cm.

Image 9.7: Plan view of Cylinder within a Cube
[[nid:add video]]
Video 9.4: Plotting an accurate Circle within a Perspective Square

Image 9.8: Plotting a Circle within a Square accurately
To plot the circular base of the cylinder onto the face of the cube, apply the following method:(a) On square ABCD, draw the diagonals to locate its centre.
(b) Divide the square into quadrants by connecting the midpoints of the sides.
(c) Locate the centre of each quadrant by drawing the diagonals.
(d) Draw horizontals and verticals through the centre of each quadrant (mm and nn, for example)
(e) Draw line Cm. Its intersection with nn gives point '1', which will lie on the circle.
By repeating this construction, eight points for the circle can be located in addition to the original tangent points (1),(2),(3) and (4).
When this construction is carried out with a perspective square, it locates eight points on the ellipse inscribed in that circle, as elucidated in the animation below.
4. Review:
Review by overlaying on correctly printed solution sheets provided below.
[Download...D9_Vertical-Cylinder-within-45-deg-Cube_Solution;
D9_Horizontal-Cylinder-within-30-60-deg-Cube-Option-a_Solution;
D9_Horizontal-Cylinder-within-30-60-deg-Cube-Option-b_Solution]
It is evident that in order to draw correct curves in perspective, a good command over ellipses is necessary. We will learn how to draw accurate ellipses in the subsequent day's session.
< Sense of Perspective Space and Day 9 End >
Day 10 Preview
Tomorrow, under Warm up, we quickly revise all that we did in the Workouts in Session 1 and 2, and Day 9.
Under Workouts, we learn to draw Ellipses and Semi-ellipses correctly.
In tomorrow's Sense of Perspective Space section, we learn to draw a Vertical Cylindrical Object of Varying Radii use a vertical reference grid of circular planes to We have taken a Sportscap Waterbottle for practice.
Downloads for Day 10: See PRINTING INSTRUCTION first.
1. D10_Sportscap-Waterbottle_Exercise
2. D10_Circular-Planes-in-Perspective_Vertical-Reference-Grid
3. D10_Sportscap-Waterbottle_Solution