Design Course
Freehand Sketching
Rediscovering the Act of Sketching
by
Day 11
Introduction to Day 11
Today, under Warm up, we quickly revise all that we did in the Workouts in Session 1 and 2, upto Day 10.
Under Workouts, we learn to draw Quadrants and Segments correctly.
In today's Sense of Perspective Space, we learn to draw a tapering cylindrical object in two-point perspective, and also cut its two sections
Preparation:
• Download and Print:
1. D11_Composite-Object-1_Exercise
2. D4_45-deg-10cm-Cube (optional, if preserved from Day 4)
3. D4_30-60-deg-10cm-Cube (optional, if preserved from Day 4)
4. Composite-Object-1_Solution
5. Composite-Object-1-Vertical-Section-45-deg_Solution
6. Composite-Object-1-Vertical-Section-30-60-deg_Solution
• Tracing sheets
• Soft pencils - 2B, 4B, 6B, etc.
• Measuring ruler/scale
• Long ruler and set squares preferably, for drawing the Grid.
Overall Time Plan: 2 hours 5 minutes
• Warm up : 15 mins.
• Workout : 65 mins.
• Sense of Perspective Space : 45 mins.
15 minute Exercise:
0-5 mins : Practice very fast hand and body movements while drawing Horizontal, Vertical, Inclined Lines, Circles, Semi-circles, Ellipses and Semi-ellipses.
5-15 mins : Repeat the various workouts covered in Session-1-3, and upto previous day WITHOUT the underlay grids, using the hand NOT normally used.
While drawing these, remember to:
1. Draw them for various lengths, and diameters.
2. Draw lines in either direction i.e. left to right, right to left and curvatures, both clockwise and anti-clockwise.
3. Draw them at various pace - fast, slow, fast to slow in a single line, etc.
This practice of initially drawing the lines fast and then slowing down will help your body get into smoother drawing action for the workouts and perspective exercises ahead.
<Warm up Ends>
Workout
Discussion: More Part Curvatures
This session focuses on drawing sectors (including quarter circles or quadrants) and segments.
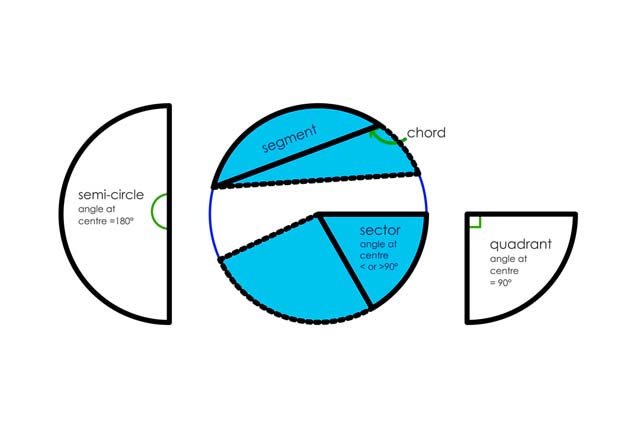
Image 11.1: Sector, Segment and Chord in a Circle
This day utilizes the circular grid template G11 and the dense square grid G12 introduced in earlier sessions, so keep them handy.
11.1) Concentric Quarter Circles and Quadrants - 10 mins - 1 sheet
To draw a quarter circle, first draw its vertical and horizontal axes, and then the curve. Remember to extend both ways beyond the axis lines, as you did for semi-circles earlier. You may first practice on the square grid G12 as underlay, and then proceed to draw only the vertical and horizontal axes but NO grid. Draw quarter circles for each of the following radii:
(a) 5cm
(b) 10cm
(c) 15cm
(d) 20cm
Continue to keep filling it in till you have completed for all intermediate radii (i.e. 6cm, 7cm, etc.)
Now, draw concentric quadrants outwards with a successive increment of 2cm in radii. To draw a correct quadrant, first the radius line, then the curve, then the second radius line to complete, as elucidated below.
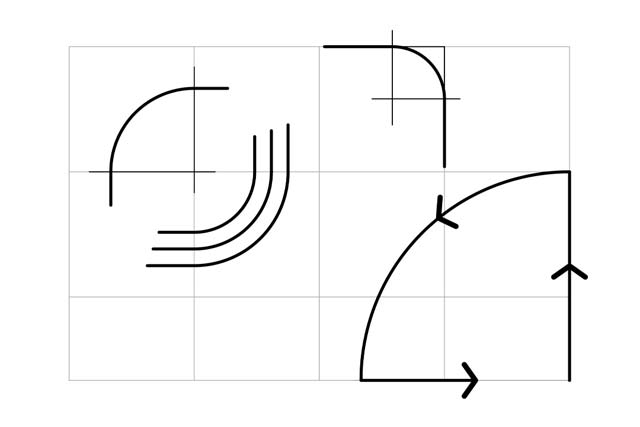
Image 11.2: Drawing Quarter Circles and Quadrants
11.2) Concentric Quarter-Ellipses and Elliptical Quadrants - 10 mins - 1 sheet
On an overlay over the dense square grid template G12, practice drawing variations of quarter-ellipses and elliptical quadrants as you did above, for quarter-ellipses and elliptical quadrants, for the following values:
(a) Major 10cm and Minor 5cm
(b) Major 15cm and Minor 7.5cm
(c) Major 20cm and Minor 10cm
Draw concentric elliptical quadrants outwards with an incremental offset of 2cm.
Note: Remember to extend the curve both ways for quarter-ellipses, as you did earlier for quarter-circles.
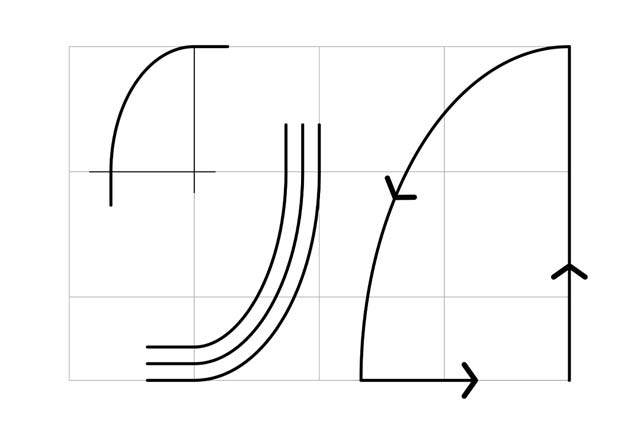
Image 11.3: Drawing a Quarter-Ellipses and Elliptical Quadrants
11.3) Floating Circular and Elliptical Quadrants - 15 mins - 2 sheets
To draw these, do NOT use a grid. Practice this for various radii (and major-minor axis values, in case of elliptical-quadrants), and for different orientations. can remove this: Also practice by changing starting points and the direction of drawing (clockwise/ anti-clockwise).
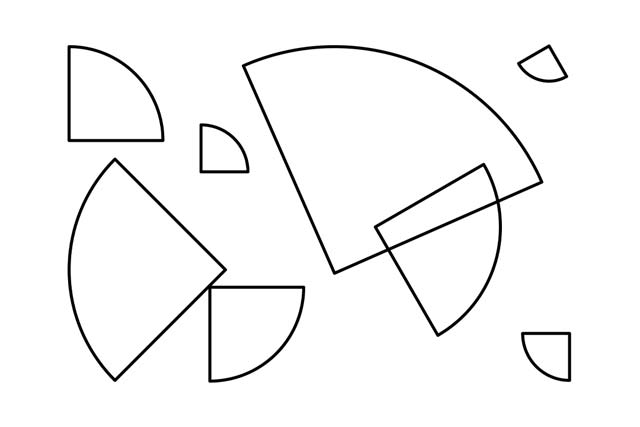
Image 11.4: Floating Circular Quadrants
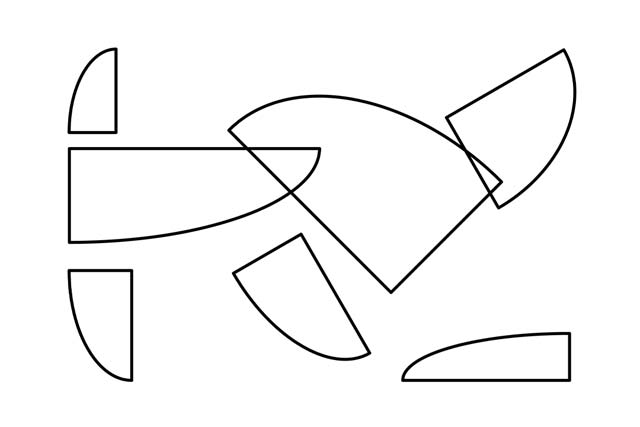
Image 11.5: Floating Elliptical Quadrants
11.4) Circular Segments on a Circular Grid - 15 mins - 2 sheet
On an overlay with the circular grid (grid G11) below, draw horizontal and vertical chord lines and complete the segments, as shown in the following image and video.
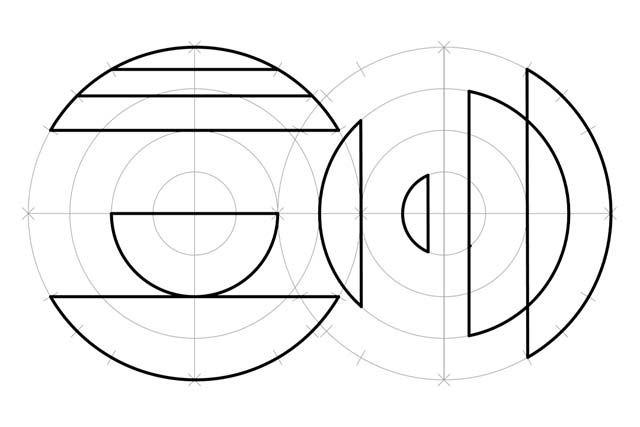
Image 11.6: Circular Segments on a Circular Grid
Video 11.1: Circular Segments on a Circular Grid
Now draw chords to randomly cut across the grid's circles and complete the segments, as shown in the image below.
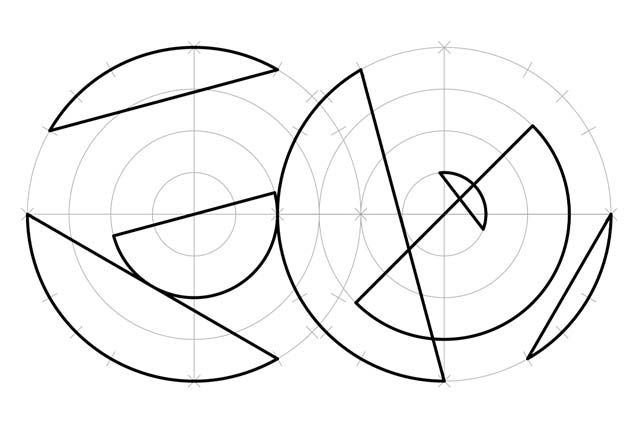
Image 11.7: Segments created by ramdomly drawn Chords on a Circular Grid
11.5) Series of Segments- 15 mins - 1 sheet
Now, using the dense square grid GT12 as a base reference, draw series of segments as shown in the video below for the following values:
(a) Chord length 15cm and Arc height 3cm
(b) Chord length 20cm and Arc height 5cm
Note: Maintain the straight line alignment of the start and end point of chords, and consistency of arc heights.
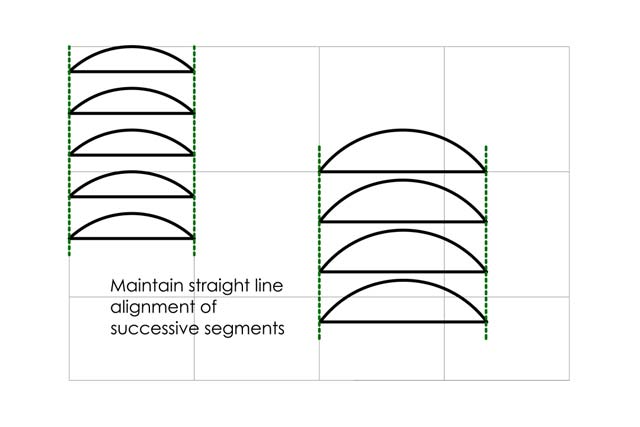
Image 11.8: Series of Circular Segments on a Square Grid
Series of Circular Segments on a Square Grid
<Workout Ends>
Sense of Perspective Space
Objective: Drawing a Composite Cylindrical Object
Provided below is the Plan and Side Elevation of a Composite Cylindrical Object [Download...D11_Composite-Object-1_Exercise]. Draw its 3D view by first generating an appropriate cuboid from the 10cm 45 deg. base cube (Provided earlier on Day-4 of Session-1, or downloadable from the link provided below).
Further, draw Vertical Sections for the same, as specified below:
(a) Picture Plane AA', oriented at 45 degrees wrt object [Download...D4_45-deg-10cm-Cube].
(b) Picture Plane BB', oriented at 30-60 degrees wrt object [Download...D4_30-60-deg-10cm-Cube].
Note: Keep in mind that a section plane at 30-60 degrees, while drawing in 30-60 degree orientation, will be parallel to the face of the cube.
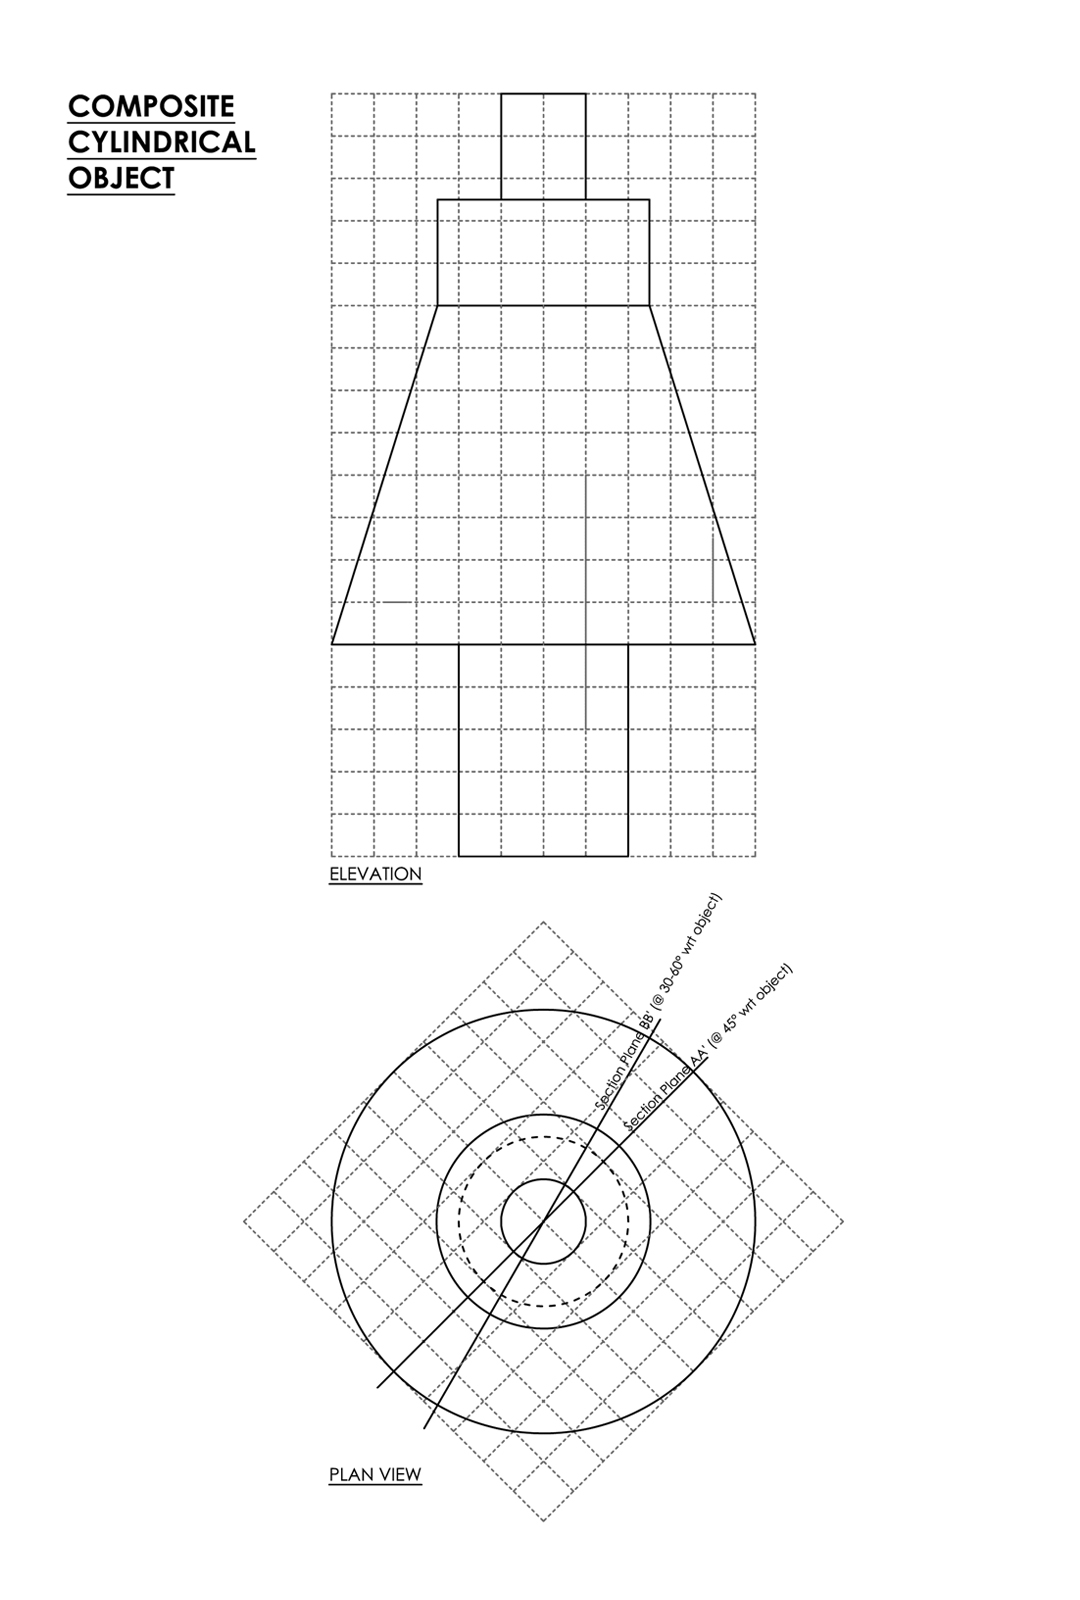
Composite Cylindrical Object
After you finish, review by superimposing the tracing paper you drew on over a correctly printed solution sheet. [Download...Composite-Object-1_Solution ; Composite-Object-1-Vertical-Section-45-deg_Solution ; Composite-Object-1-Vertical-Section-30-60-deg_Solution]
< Sense of Perspective Space and Day 11 End >
Day 12 Preview
Tomorrow, under Warm up, we quickly revise all that we did in the Workouts in Sessions 1-3, and upto Day 11.
For Workout test, we do a body movement and line quality self-assessment through composition sheets, using all forms of curvatures.
In Tomorrow's Sense of Perspective Space: Test, we test how you draw a cross-plan composite object. You do a self-assessment of the same, using comparison sheets provided after the exercise.
Downloads for Day 12: See PRINTING INSTRUCTION first.
1. D12_Composite-Object-2_Exercise
2. D4_45-deg-10cm-Cube (optional, if preserved from Day 4)
3. D4_30-60-deg-10cm-Cube (optional, if preserved from Day 4)
4. D12_Composite-Object-2-at-45-deg_Solution
5. D12_Composite-Object-2-at-30-60-deg_Solution